- Name - Matryoshka
- Category - Reverse Engineering
- Points - 50+100+300+500
- Description - n/a
- Binary - Download here
Level 1
root@kali: ~/Desktop
root@kali:~/Desktop# ./stage1.bin
Usage: ./stage1.bin <pass>
root@kali:~/Desktop# ./stage1.bin vulnerablespace
Try again...
root@kali:~/Desktop#
Looking at it in IDA we get our answer straight away:

root@kali: ~/Desktop
root@kali:~/Desktop# ./stage1.bin Much_secure__So_safe__Wow
Good good!
c3RhZ2UyLmJpbgAAAAAAAAAAAAAAAAAAAAAAAAAAAAAAAAAAAAAAAAAAAAAAAAAAAAAAAAAAAAAA
AAAAAAAAAAAAAAAAAAAAAAAAAAAAAAAAAAAAAAAAAAAAAAAAAAAAAAAAADAwMDA3NTUAMDAwMTc1
..
AAAAAAAAAAAAAAAAAAAAAAAAAAAAAAAAAAAAAAAAAAAAAAAAAAAAAAAAAAAAAAAAAAAAAAAAAAAA
AAAAAAAAAAAAAAAAAAAAAAAAAAAAAAAAAAAAAAAAAAAAAA==
root@kali:~/Desktop#
Apart from the success message, the binary outputs a long base64 string which translates to the binary used for the next stage.
Level 2
if ( 42 * (strlen(*(const char **)(a2 + 8)) + 1) != 504 )
    goto LABEL_31;
v4 = 1;
if ( **(_BYTE **)(a2 + 8) != 80 )
    v4 = 0;
if ( 2 * *(_BYTE *)(*(_QWORD *)(a2 + 8) + 3LL) != 200 )
    v4 = 0;
if ( **(_BYTE **)(a2 + 8) + 16 != *(_BYTE *)(*(_QWORD *)(a2 + 8) + 6LL) - 16 )
    v4 = 0;
v3 = *(_BYTE *)(*(_QWORD *)(a2 + 8) + 5LL);
if ( v3 != 9 * strlen(*(const char **)(a2 + 8)) - 4 )
    v4 = 0;
if ( *(_BYTE *)(*(_QWORD *)(a2 + 8) + 1LL) != *(_BYTE *)(*(_QWORD *)(a2 + 8) + 7LL) )
    v4 = 0;
if ( *(_BYTE *)(*(_QWORD *)(a2 + 8) + 1LL) != *(_BYTE *)(*(_QWORD *)(a2 + 8) + 10LL) )
    v4 = 0;
if ( *(_BYTE *)(*(_QWORD *)(a2 + 8) + 1LL) - 17 != **(_BYTE **)(a2 + 8) )
    v4 = 0;
if ( *(_BYTE *)(*(_QWORD *)(a2 + 8) + 3LL) != *(_BYTE *)(*(_QWORD *)(a2 + 8) + 9LL) )
    v4 = 0;
if ( *(_BYTE *)(*(_QWORD *)(a2 + 8) + 4LL) != 105 )
    v4 = 0;
if ( *(_BYTE *)(*(_QWORD *)(a2 + 8) + 2LL) - *(_BYTE *)(*(_QWORD *)(a2 + 8) + 1LL) != 13 )
    v4 = 0;
if ( *(_BYTE *)(*(_QWORD *)(a2 + 8) + 8LL) - *(_BYTE *)(*(_QWORD *)(a2 + 8) + 7LL) != 13 )
    v4 = 0;
if ( v4 )
    result = sub_40064D(*(const char **)(a2 + 8));
else
LABEL_31:
    result = fprintf(stdout, "Try again...\n", a2);
The goal here is to make it to sub_40064D and hence we need to satify each equation. These state that:
- Line 1 - Password length = 11 characters
- Line 4 - password[0] = 'P'
- Line 6 - password[3] = 'd'
- Line 8 - password[6] = password[0] - 32 = 'p'
- Line 11 - password[5] = (len(password) * 9) - 4 = '_'
- Line 13 - password[1] = password[7]
- Line 15 - password[1] = password[10]
- Line 17 - password[1] = password[0] + 17 = 'a'
- Line 19 - password[3] = password[9]
- Line 21 - password[4] = 'i'
- Line 23 - password[2] - password[1] = 13
- Line 25 - password[8] - password[7] = 13
Level 3

void sub_4007FD()
{
    signed int v0; // ecx@1

    v0 = 1000 * dest;
    if ( v0 / 68 > 999 && v0 / 68 <= 1000 )
        signal(11, handler);
}
The function checks if dest, which points to the start of our input string, is equal to 68 decimal, i.e. 0x44, i.e. 'D'. The signal handler points to the 2nd signal handler, sub_4008C7 which has the following code:
void sub_4008C7()
{
    signed int v0; // ecx@1

    v0 = 1000 * byte_6040C2;
    if ( v0 / 100 > 999 && v0 / 100 <= 1000 )
        signal(11, (__sighandler_t)sub_400926);
}
This checks if the 2nd character of the input string is equal to 'i'. Going through all the signal handlers we get the flag:
Did_you_like_signals?
Level 4
root@kali: ~/Desktop
root@kali:~/Desktop# file stage4.bin
stage4.bin: DOS/MBR boot sector
root@kali:~/Desktop#
An MBR boot sector ?? What am I suppose to do with it ? After some research I thought I'd tackle it using Bochs and IDA which, to be fair, did get me the final flag, but not without it's fair share of pain and sufferance. To get it working I roughly followed this guide. I'll still be explaining the procedure from the beginning as I felt it was quite an achievement when I saw it run the MBR.
Create a Hard Disk image by running bximage.exe found in the Bochs folder. Stick to the default settings by pressing Enter at each stage. Make sure to run the binary from a writeable folder as the files are created there by default.
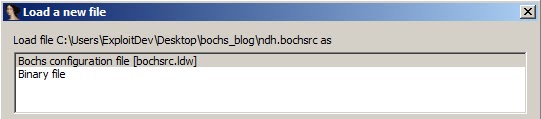
Now we need to create a bochsrc file for Bochs to load which references our newly created hard disk. Create a file called ndh.bochsrc containing the following lines:
memory: guest=512, host=256
ata0-master: type=disk, path="c.img", mode=flat
boot: disk
The 1st line is there only for IDA to recognise that the file is a bochsrc. The 2nd line is copied from the end of the bximage.exe wizard and the 3rd line tells Bochs to start booting from disk. The next step is to overwrite the first sectors of c.img with the MBR. I'm sure this can be done using dd but I've opted to use the following python script:
    # open image file
    f = open("c.img", "r+b")
    if not f:
         print "Could not open image file!"

    # open MBR file
    f2 = open("stage4.bin", "rb")
    if not f2:
        print "Could not open mbr file!"

    # read whole MBR file
    mbr = f2.read()
    f2.close()

    # update image file
    f.write(mbr)
    f.close()
Run C:\path\to\bochs\bochs.exe -f ndh.bochsrc, click Start and you should get a retro VM executing the MBR sectors:

debug001:00000E67 push    edi
debug001:00000E68 push    eax
debug001:00000E69 push    esi
debug001:00000E6A push    ebx
debug001:00000E6B
debug001:00000E6B loc_146B:
debug001:00000E6B
debug001:00000E6B cmp     eax, 0
debug001:00000E6E jz      short loc_1489
debug001:00000E70 mov     cl, [edi]
debug001:00000E72 mov     dl, [esi]
debug001:00000E74 xor     cl, dl
debug001:00000E76 mov     [edi], cl
debug001:00000E78 dec     eax
debug001:00000E79 dec     ebx
debug001:00000E7A inc     edi
debug001:00000E7B inc     esi
debug001:00000E7C cmp     ebx, 0
debug001:00000E7F jg      short loc_146B
debug001:00000E81 pop     ebx
debug001:00000E82 push    ebx
debug001:00000E83 sub     esi, ebx
debug001:00000E85 jmp     short loc_146B
This function decrypts the messages used in the program and encrypts our input. The messages before decryption:


6C 53 05 6A 5C FC FB 0E AD 4A B9 93 AD .. .. ..I found the program to be hard to follow instruction by instruction and after a while I got tired of pressing F7 so I've created a Read/Write Hardware breakpoint on the input buffer. After a few breakpoint I've arrived at what looked something promising:

Following it through we get Good_Game_!. The string displays the success message in the VM but was rejected when I submitted it to the CTF. I got a bit frustrated at this as I was pretty tired. Luckily the answer was not far off. I continued monitoring the read/write accesses to the input string and got to another set of comparisons:

28 37 77 5b 31 90 d4 68 df 2c b9Using the pre-found key and this we compute the magic word:
   +---------------------------------------------------------------------------------------+
   |  Result  |  28  |  37  |  77  |  5B  |  31  |  90  |  D4  |  68  |  DF  |  2C  |  B9  |
   |----------+------+------+------+------+------+------+------+------+------+------+------+
   |    Key   |  6C  |  53  |  05  |  6A  |  5C  |  FC  |  FB  |  0E  |  AD  |  4A  |  B9  |
   |----------+------+------+------+------+------+------+------+------+------+------+------+
   | Hex Word |  44  |  64  |  72  |  31  |  6D  |  6C  |  2F  |  66  |  72  |  66  |  00  |
   +---------------------------------------------------------------------------------------+
The hex words translate to Ddr1ml/frf which give us the success message and also worked when submitting it to the CTF:

No comments:
Post a Comment